
# Terraform开发
# terraform的功能概要
目标:定义“资源”,抽象资源,并且能够在terraform中无痛维护资源的状态
好处:
- 使用terraform能快速管理批量的资源
- 无需关注资源开通、更新、销毁的细节,交给厂商实现
- 开通资源的操作只要熟悉HCL (opens new window)的语法即可
角色:
- 用户:terraform的使用者
- terraform:具体的管理资源的工具
- 厂商:定义“资源”并且实现terraform接口的厂家,不同的厂家有不同的资源,不同的资源有不同的行为
常用的terraform的几个命令:
- validate:校验配置文件
- plan:查看执行计划
- apply:应用执行计划
- destroy:删除资源
- show:查看目前资源状态
- refresh:更新资源的状态
配置文件样例:
terraform {
  required_providers {
    xxxxx = {
      source = "www.xxxxx.cn/xxxxx/xxxxx"
    }
  }
}
1
2
3
4
5
6
7
8

# 目录规范
│  .copywrite.hcl
│  .gitignore
│  .golangci.yml
│  .goreleaser.yml
│  CHANGELOG.md                         # 版本信息,每一个版本必须填写
│  GNUmakefile                          # 构建任务
│  go.mod                               # 依赖包说明
│  go.sum
│  LICENSE
│  main.go                              # 程序入口
│  README.md                            # 对内开发者文档手册
│  terraform-registry-manifest.json
├─assets                                # 文档的图片与归档记录
├─bin
│  ├─darwin_amd64
│  ├─darwin_arm64
│  ├─linux_amd64
│  ├─linux_arm64
│  ├─windows_amd64
│  └─windows_arm64
├─docs
├─examples                              # terraform的配置文件样例
│  ├─data-sources
│  ├─provider
│  └─resources
├─generate-doc                          # 对外的文档
│  │  index.md
│  ├─data-sources
│  └─resources
├─internal                              # 内部私有目录,不暴露
│  ├─common                             # 公共模块
│  ├─datasource                         # terraform的datasource
│  ├─extend                             # 对于模块的一些扩展与封装
│  │  ├─sdk                             # 对于sdk的扩展与封装
│  │  └─terraform                       # 对于terraform的扩展和封装
│  ├─provider                           # terraform的provider,正常来说只有一个文件

│  ├─resource                           # terraform的resource
│  ├─utils                              # terraform的工具
│  └─validator                          # terraform的validator
└─templates                             # 自动生成文档的templates
2
3
4
5
6
7
8
9
10
11
12
13
14
15
16
17
18
19
20
21
22
23
24
25
26
27
28
29
30
31
32
33
34
35
36
37
38
39
40
41
# 本地调试debug教程
配置方法:
打开configurations,在Program arguments中配置
-debug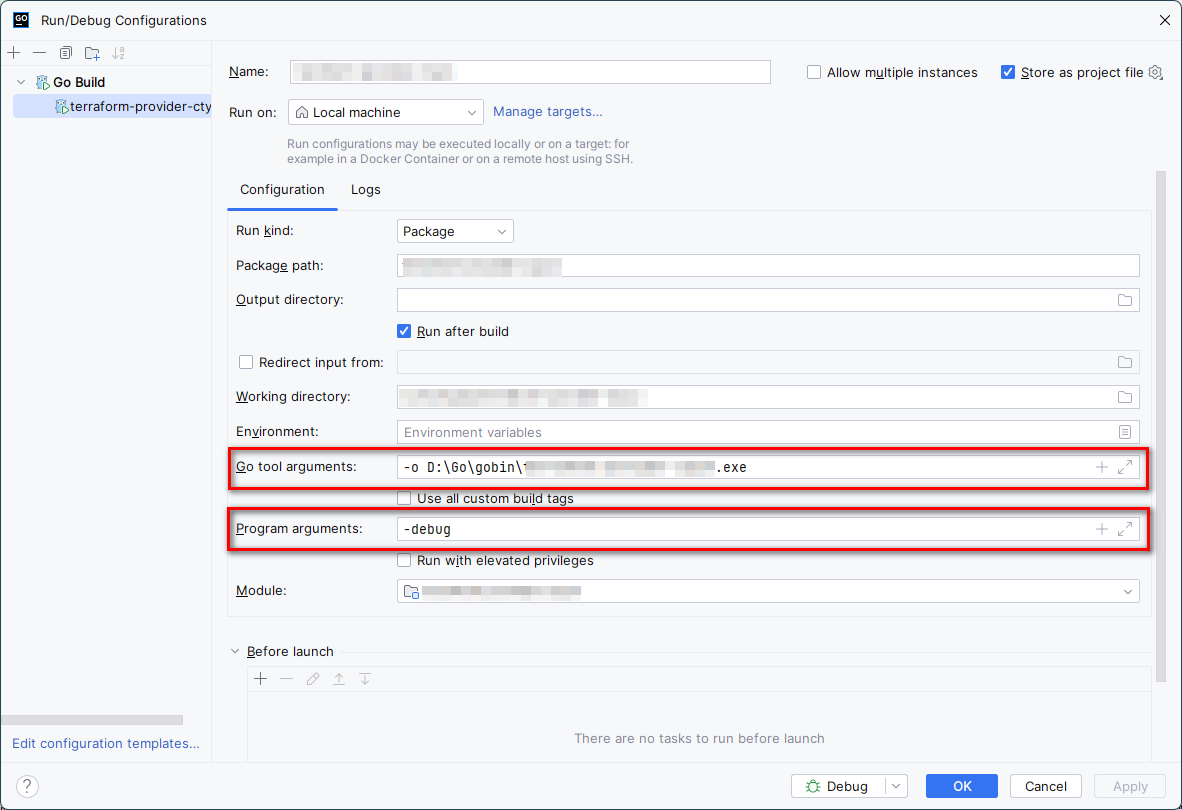
启动应用,控制台会输出下面的文本
API server listening at: 127.0.0.1:10369
{"@level":"debug","@message":"plugin address","@timestamp":"2024-01-30T17:45:23.088557+08:00","address":"127.0.0.1:10372","network":"tcp"}
Provider started. To attach Terraform CLI, set the TF_REATTACH_PROVIDERS environment variable with the following:

        Command Prompt: set "TF_REATTACH_PROVIDERS={"www.xxxxx.cn/xxxxx/xxxxx":{"Protocol":"grpc","ProtocolVersion":6,"Pid":25500,"Test":true,"Addr":{"Network":"tcp","String":"127.0.0.1:10372"}}}"
        PowerShell:     $env:TF_REATTACH_PROVIDERS='{"www.xxxxx.cn/xxxxx/xxxxx":{"Protocol":"grpc","ProtocolVersion":6,"Pid":25500,"Test":true,"Addr":{"Network":"tcp","String":"127.0.0.1:10372"}}}'
1
2
3
4
5
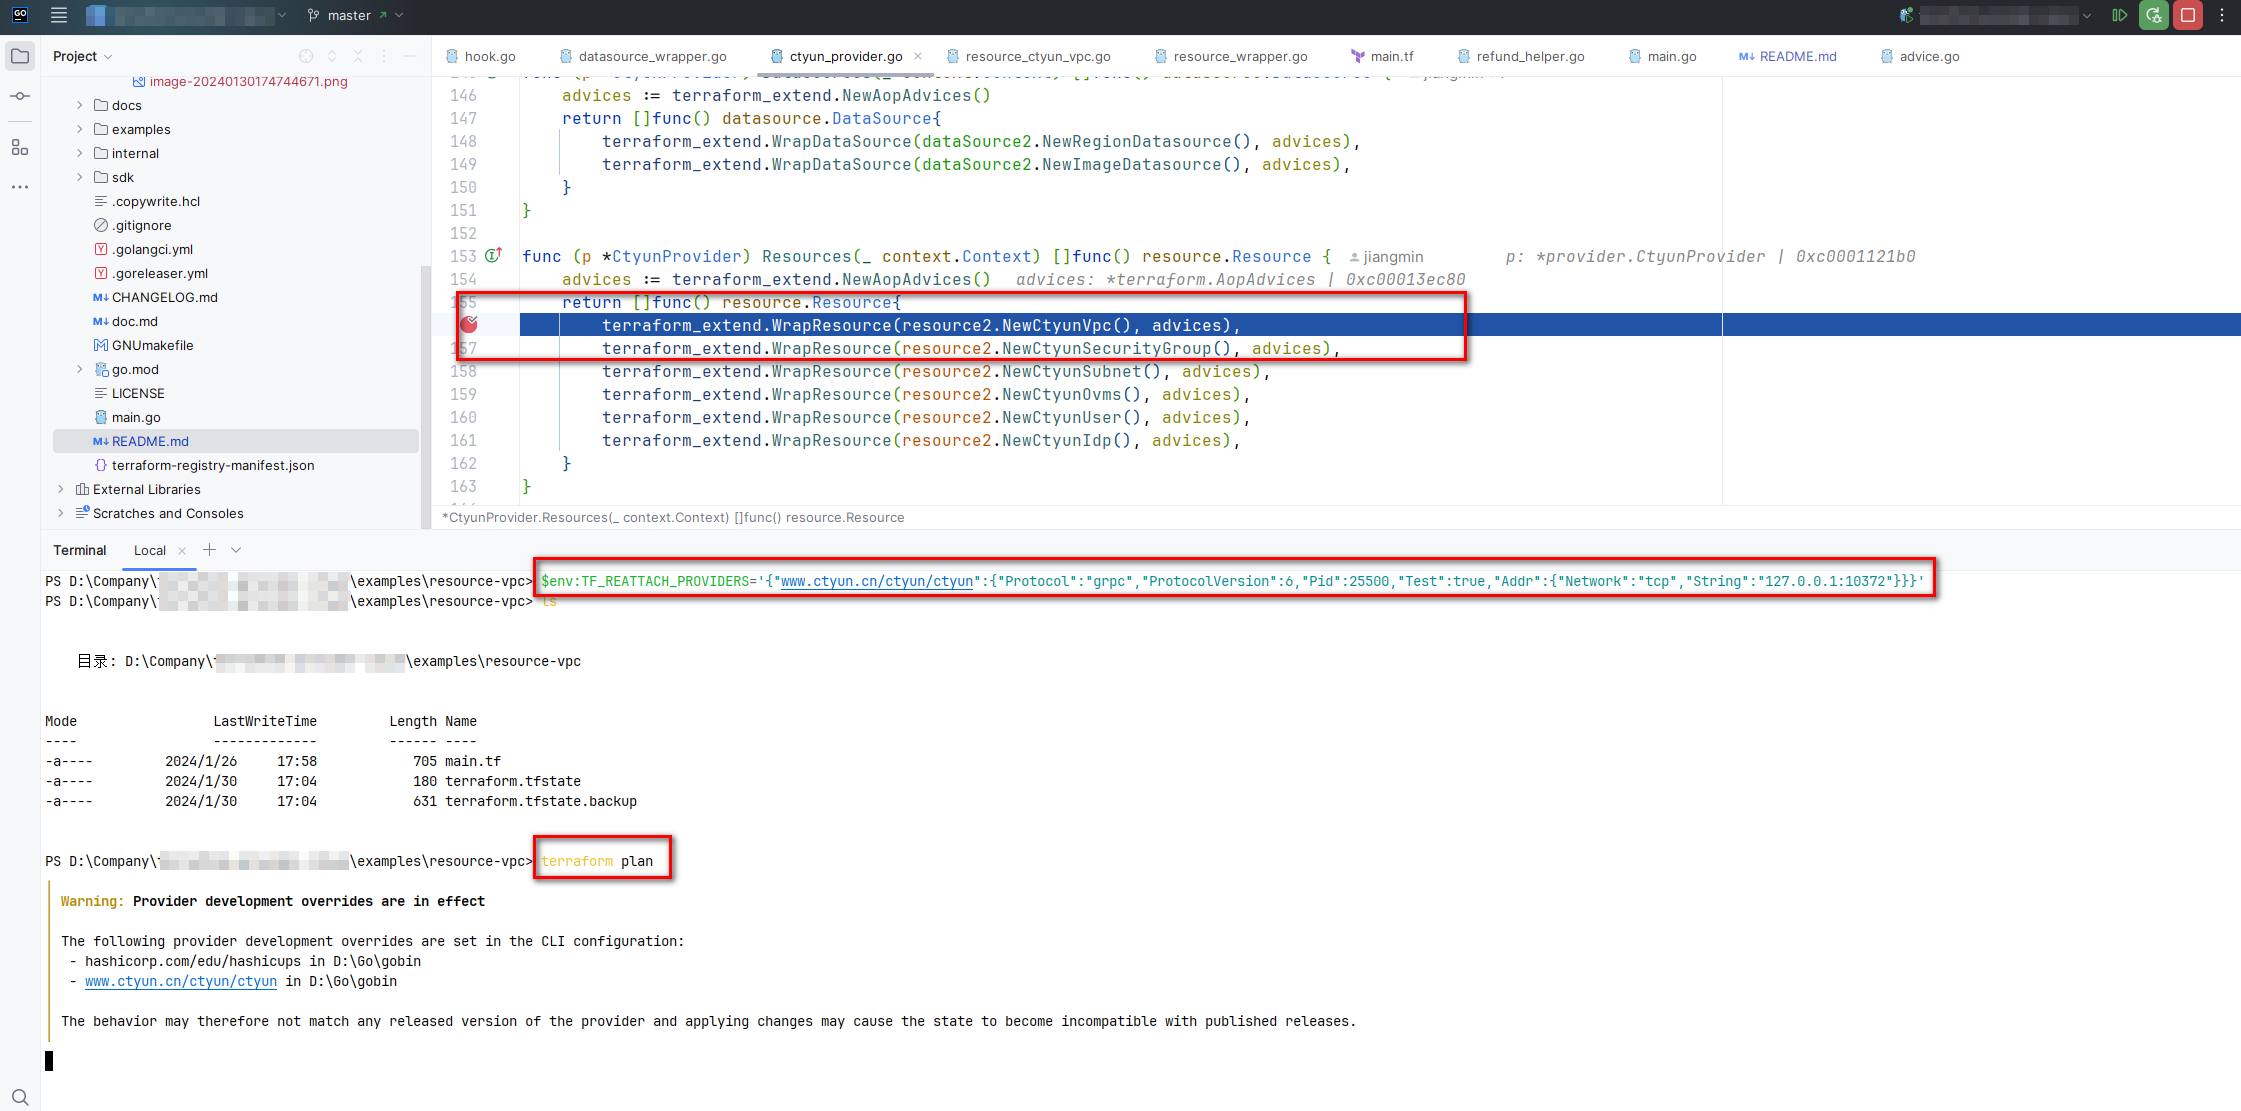
6把下面文本中的
$env:TF_REATTACH_PROVIDERS='{"www.xxxxx.cn/xxxxx/xxxxx":{"Protocol":"grpc","ProtocolVersion":6,"Pid":25500,"Test":true,"Addr":{"Network":"tcp","String":"127.0.0.1:10372"}}}'拷贝,在终端中执行
执行terraform随意的命令就可以进入debug了
# 打包本地使用教程
- 开发依赖项
- Terraform (opens new window) >= 1.0
- Go (opens new window) >= 1.21.5
- 配置PATH路径
- 添加环境变量TERRAFORM_HOME = D:\Terraform\terraform_1.6.6_windows_amd64
- 在PATH中添加%TERRAFORM_HOME%

在环境变量中配置下面的环境变量
- TF_LOG = INFO,terraform的日志输出级别
- TF_LOG_PATH = %TERRAFORM_HOME%\logs\logs.txt,terraform的日志输出路径
- TF_CLI_ARGS_apply = -parallelism=1,terraform的最大启动实例个数,为了防止并发出现问题,强烈推荐您将此值设置成1
- GOBIN = D:\Go\gobin,配置go打包输出的默认文件路径
在终端中执行命令,进入目录中
cd $env:APPDATA1在此目录创建terraform.rc文件
provider_installation {

  dev_overrides {
      "www.xxxxx.cn/xxxxx/xxxxx"="D:/Go/gobin/"    # 本地调试的目录地址,这里设置为GOBIN目录
  }

  # For all other providers, install them directly from their origin provider
  # registries as normal. If you omit this, Terraform will _only_ use
  # the dev_overrides block, and so no other providers will be available.
  direct {}
}
1
2
3
4
5
6
7
8
9
10
11打包的时候,直接在主目录下执行,打包到GOBIN目录中
go install .1进入\examples\provider-install-verification目录,验证是否正常运行
terraform init
terraform plan
1
2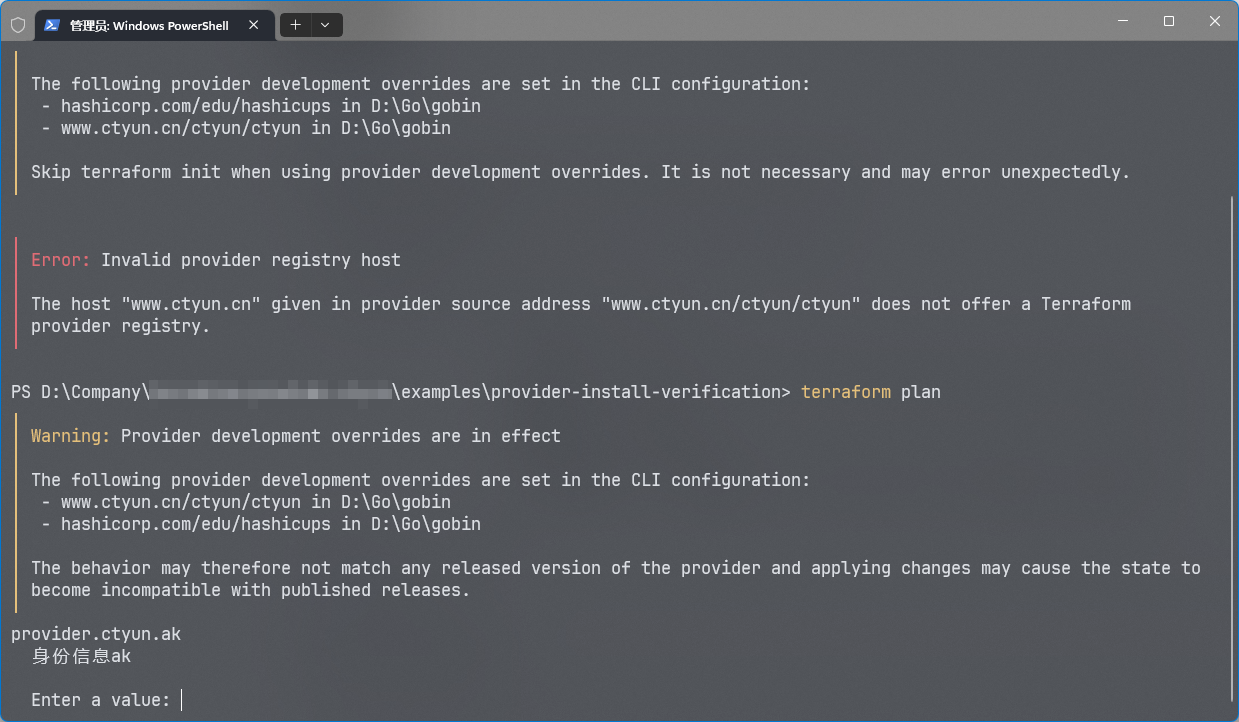
# 外部文档的快速生成
- 参考terraform-plugin-docs (opens new window)的使用方法
- 下载对应的插件安装包
- 在项目主目录中执行
tfplugindocs generate命令 - 具体的文档生成在doc目录下
- 快速生成说明文档的命令行:详见GNUmakefile文件下的generatedoc任务
# 跨平台编译
快速生成跨平台的包:详见GNUmakefile文件下的build-all任务
# 关于Resource和Datasource的注册
# 开发建议
如果一个选项不是Computed: true,那么最好也考虑写上Optional:true,这样方便写返回
在Read接口里面一定要考虑资源在后台被人为删除的情况,terraform需要同步调用**response.State.RemoveResource(ctx)**删除自身
在Create接口里,如果创建一个收费的资源,那么应该按照下面的思路组织代码
- 校验整体业务参数
- 下单,这里的接口一般对接各自产线的下单接口
- 把对应的受理订单号(masterOrderId)写到state里面,response.State.Set(ctx, plan)
- 轮询订单的状态,这里有通用的方法:helper.OrderLoop
- 如果轮询有问题,则直接报错返回
- 此时terraform会抛出错误给客户
- 客户通过terraform再次执行read动作
- 此时在read方法中,需要进行判断:如果id不为空,那么当前状态是有效的,继续处理;如果id为空masterOrderId也为空,此时状态是无效的,直接执行response.State.RemoveResource(ctx)并返回;如果id为空且masterOrderId不为空,则需要继续使用helper.OrderLoop轮询,若还是轮询不到id,那么执行response.State.RemoveResource(ctx)并返回,如果轮询到了,则把id写回到状态中response.State.Set(ctx, plan)
如果直接或者间接调用了受理下单接口成功了(返回了id),那么必须第一时间调用response.State.Set(ctx, plan),把id设置回去;因为存在一种可能的情况:后续代码报错导致terraform的id设置不了,资源开出来了但是用户无感知,会导致资源一直运行中然后一直被扣费
研一的接口:如果通过id查询不到资源,那么一般来说会报错,而不是返回空;我们可以通过如下类似的代码进行判断
// getSecurityGroupRule 查询安全组规则
func (c *xxxxxSecurityGroupRule) getSecurityGroupRule(ctx context.Context, securityGroupId string, securityGroupRuleId string) (*xxxxxSecurityGroupRuleConfig, error) {
	var config xxxxxSecurityGroupRuleConfig
	request := &security_group_rule.SecurityGroupRuleDescribeRequest{
		RegionId:            c.meta.RegionId,
		SecurityGroupId:     securityGroupId,
		SecurityGroupRuleId: securityGroupRuleId,
	}
	response, err := c.meta.Client.Apis.SecurityGroupRuleDescribeApi.Do(ctx, c.meta.Credential, request)
	if err != nil {
		// 如果查询不到信息会报异常,此时直接返回空
		if err.ErrorCode() == common.OpenapiSecurityGroupRuleNotFound {
			return nil, nil
		}
		return nil, err
	}
	...
}
1
2
3
4
5
6
7
8
9
10
11
12
13
14
15
16
17
18如果create、update走了多个创建或更新的接口,请把走受理下单(和金额相关)的动作尽量放在代码的最后,以防止代码出现错误导致用户无感知
涉及到敏感操作,例如开关机等,需要由用户决定,而不能程序自动进行执行
不能在examples文件中出现如ak和sk等敏感信息,应该配置在对应的环境变量中
不能在项目任何文档内出现任何敏感信息,例如AK、SK等
实现terraform validator的接口时,注意需要在ValidateXXX接口中对应填写下面的内容
if request.ConfigValue.IsNull() || request.ConfigValue.IsUnknown() {
    return
}
1
2
3// 例子 func (e validatorEcsPassword) ValidateString(ctx context.Context, request validator.StringRequest, response *validator.StringResponse) { if request.ConfigValue.IsNull() || request.ConfigValue.IsUnknown() { return } password := request.ConfigValue.ValueString() length := len(password) if length < 8 || length > 30 { errMessage := "ecs密码长度必须在8-30" response.Diagnostics.AddError(errMessage, errMessage) return } if strings.HasPrefix(password, "/") { errMessage := "ecs密码不能以/开头" response.Diagnostics.AddError(errMessage, errMessage) return } ... }1
2
3
4
5
6
7
8
9
10
11
12
13
14
15
16
17
18
19
# 关于官方镜像源的部署
可以参考官方文档Publishing Providers (opens new window)
密钥对准备部分,到GnuPG (opens new window)中下载Gpg4win (opens new window),并安装
- 打开命令行,执行
gpg --full-generate-key,生成对应的密钥对,中途会弹窗让你输入密钥对的密码
PS C:\Users\44872> gpg --full-generate-key
gpg (GnuPG) 2.4.5; Copyright (C) 2024 g10 Code GmbH
This is free software: you are free to change and redistribute it.
There is NO WARRANTY, to the extent permitted by law.

Please select what kind of key you want:
   (1) RSA and RSA
   (2) DSA and Elgamal
   (3) DSA (sign only)
   (4) RSA (sign only)
   (9) ECC (sign and encrypt) *default*
  (10) ECC (sign only)
  (14) Existing key from card
Your selection?
Please select which elliptic curve you want:
   (1) Curve 25519 *default*
   (4) NIST P-384
   (6) Brainpool P-256
Your selection?
Please specify how long the key should be valid.
         0 = key does not expire
      <n>  = key expires in n days
      <n>w = key expires in n weeks
      <n>m = key expires in n months
      <n>y = key expires in n years
Key is valid for? (0) 0
Key does not expire at all
Is this correct? (y/N) y

GnuPG needs to construct a user ID to identify your key.

Real name: MinChiang
Email address: 448725235@qq.com
Comment: Personal
You selected this USER-ID:
    "MinChiang (Personal) <448725235@qq.com>"

Change (N)ame, (C)omment, (E)mail or (O)kay/(Q)uit? O
We need to generate a lot of random bytes. It is a good idea to perform
some other action (type on the keyboard, move the mouse, utilize the
disks) during the prime generation; this gives the random number
generator a better chance to gain enough entropy.
We need to generate a lot of random bytes. It is a good idea to perform
some other action (type on the keyboard, move the mouse, utilize the
disks) during the prime generation; this gives the random number
generator a better chance to gain enough entropy.
gpg: revocation certificate stored as 'C:\\Users\\44872\\AppData\\Roaming\\gnupg\\openpgp-revocs.d\\A11B7B1A1153CA01BECF82E46D93AEF9000BCF7C.rev'
public and secret key created and signed.

pub   ed25519 2024-05-17 [SC]
      A11B7B1A1153CA01BECF82E46D93AEF9000BCF7C
uid                      MinChiang (Personal) <448725235@qq.com>
sub   cv25519 2024-05-17 [E]
1
2
3
4
5
6
7
8
9
10
11
12
13
14
15
16
17
18
19
20
21
22
23
24
25
26
27
28
29
30
31
32
33
34
35
36
37
38
39
40
41
42
43
44
45
46
47
48
49
50
51
52
53- 查看生成的密钥,可以看见密钥对的ID为
A11B7B1A1153CA01BECF82E46D93AEF9000BCF7C
PS C:\Users\44872> gpg --list-key
[keyboxd]
---------
pub   ed25519 2024-05-17 [SC]
      A11B7B1A1153CA01BECF82E46D93AEF9000BCF7C
uid           [ultimate] MinChiang (Personal) <448725235@qq.com>
sub   cv25519 2024-05-17 [E]
1
2
3
4
5
6
7- 查看公钥,
gpg --export --armor A11B7B1A1153CA01BECF82E46D93AEF9000BCF7C
PS C:\Users\44872> gpg --export --armor A11B7B1A1153CA01BECF82E46D93AEF9000BCF7C
-----BEGIN PGP PUBLIC KEY BLOCK-----

mDMEZkavIxYJKwYBBAHaRw8BAQdAHEVsMOIO/yUi9AKMPA36cTZ/qSVv5dWwKTiH
TWC6/eq0J01pbkNoaWFuZyAoUGVyc29uYWwpIDw0NDg3MjUyMzVAcXEuY29tPoiT
BBMWCgA7FiEEoRt7GhFTygG+z4LkbZOu+QALz3wFAmZGryMCGwMFCwkIBwICIgIG
FQoJCAsCBBYCAwECHgcCF4AACgkQbZOu+QALz3wYEQEA46OGBB3r3LHEFd7gulU5
VLzfiD1xIoYV+XFDjeEkXB0BAJMZSQEHcYV2Vt19AGpwmZmkTmQ82PO1Fc2QXDlb
TlAPuDgEZkavIxIKKwYBBAGXVQEFAQEHQKBtkwomAF0lqhIjIIThIFCVXVLVOdLy
F11qpEHs7RgBAwEIB4h4BBgWCgAgFiEEoRt7GhFTygG+z4LkbZOu+QALz3wFAmZG
ryMCGwwACgkQbZOu+QALz3zMVgEAkc8KNzbnHydYFJ1WZuxLGvkWEpA4qLtw4krO
MVc/KsYBAOS1puiTmTLTB0/F3bG9pu3kBUN0QFiFoBo14CBtNkQK
=4OP0
-----END PGP PUBLIC KEY BLOCK-----
1
2
3
4
5
6
7
8
9
10
11
12
13
14- 查看私钥,
gpg --export-secret-keys --armor A11B7B1A1153CA01BECF82E46D93AEF9000BCF7C
PS C:\Users\44872> gpg --export-secret-keys --armor A11B7B1A1153CA01BECF82E46D93AEF9000BCF7C
-----BEGIN PGP PRIVATE KEY BLOCK-----

{敏感的密钥内容}
-----END PGP PRIVATE KEY BLOCK-----
1
2
3
4
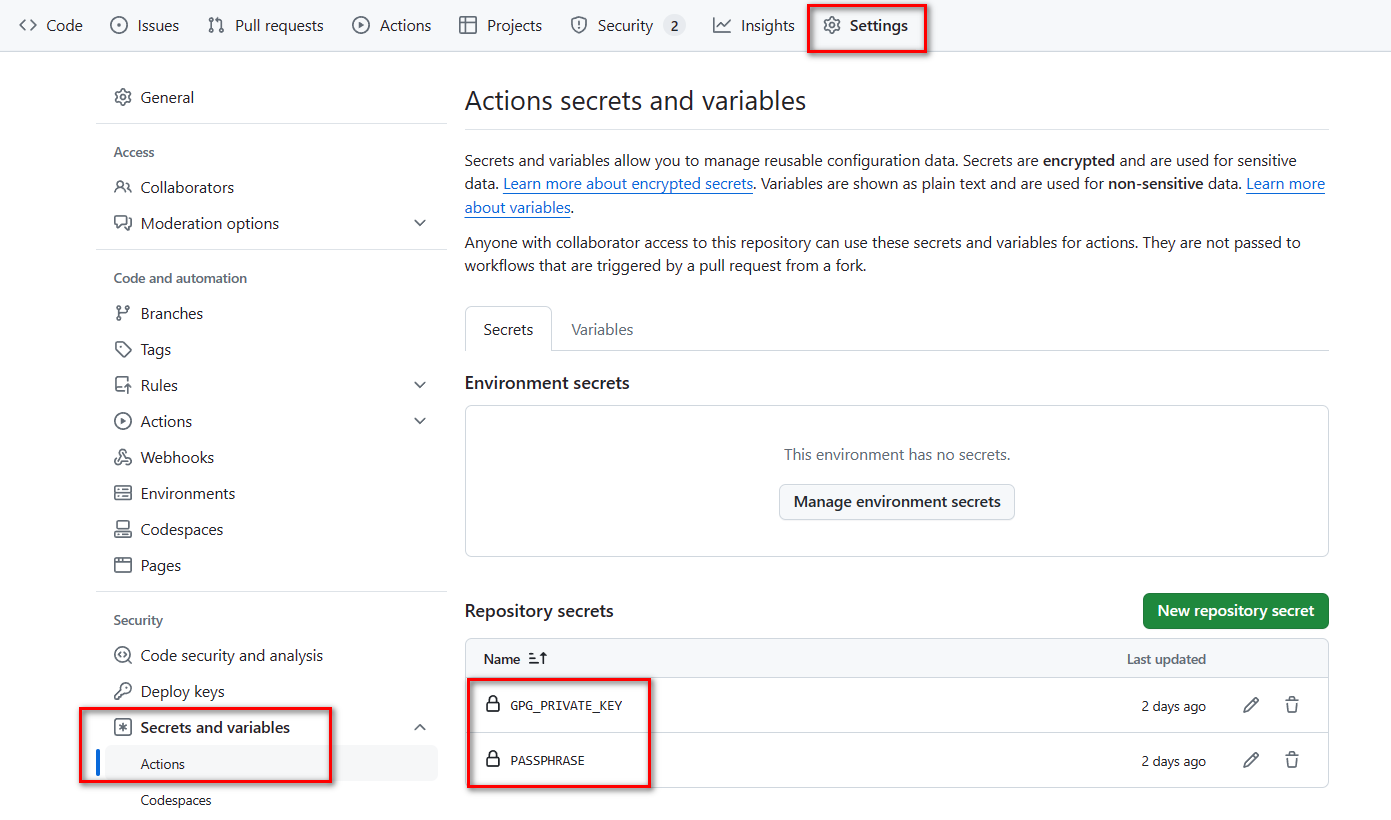
5- 创建对应的Github仓库,在待发布仓库的Settings -> Security -> Secrets and variables -> Actions -> Repository secrets中,新增两个secret,GPG_PRIVATE_KEY:刚刚导出的私钥,PASSPHRASE:密钥对的密码
- 到Terraform中央仓库 (opens new window)中,点击Publish -> Provider
- 打开命令行,执行
开始发布
编写好对应的provider
填写
terraform-registry-manifest.json文件{ "version": 1, "metadata": { "protocol_versions": ["6.0"] } }1
2
3
4
5
6从hashicorp/terraform-provider-scaffolding-framework (opens new window)仓库中拷贝.goreleaser.yml file (opens new window)文件到你的工程目录中
拷贝GitHub Actions workflow from the terraform-provider-scaffolding-framework repository (opens new window) to
.github/workflows/release.yml到你的工程目录中上传代码到Github中
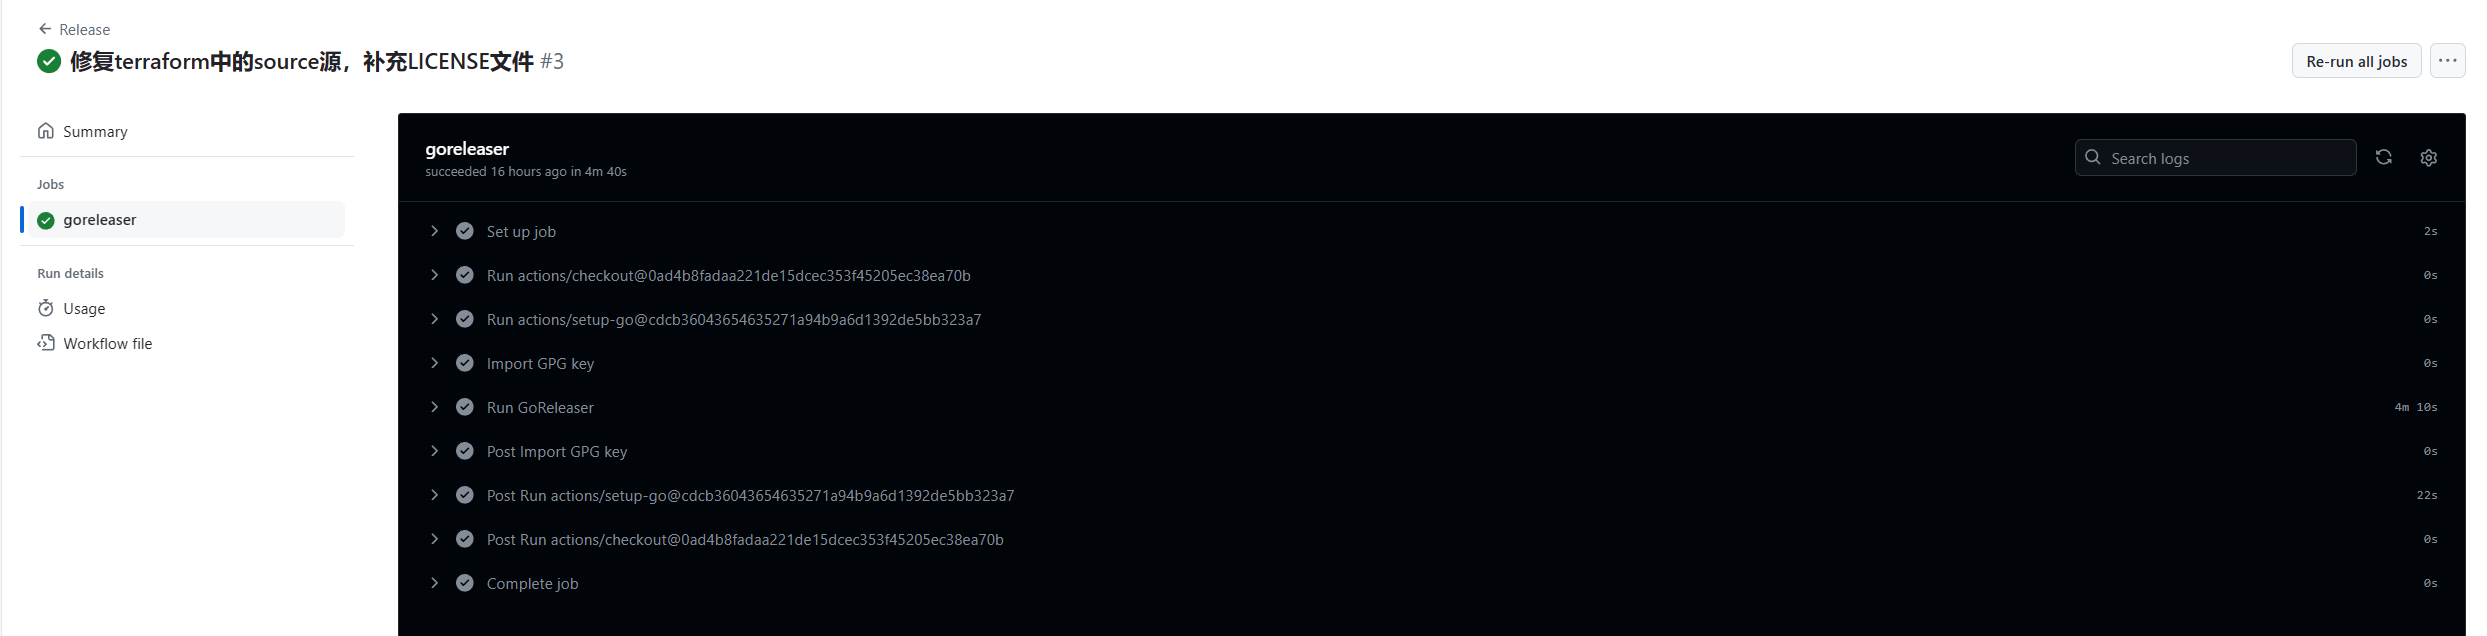
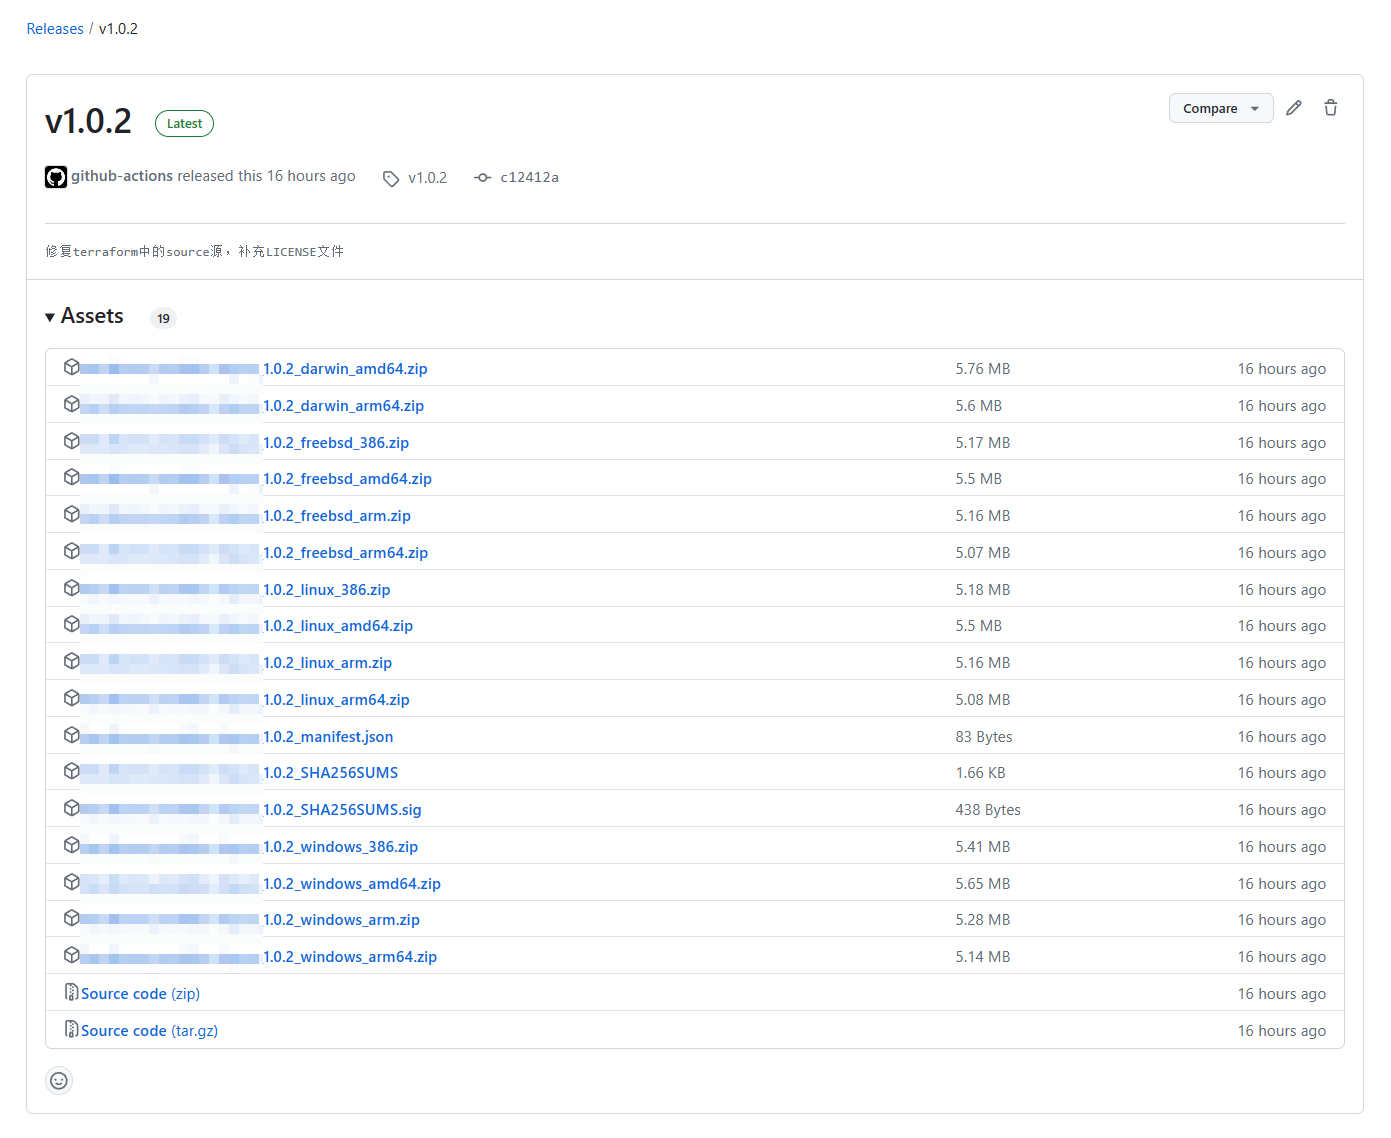
推送您的tag到Github中,会自动打包产出物
在Actions中查看构建,在Code -> Releases中查看发布情况
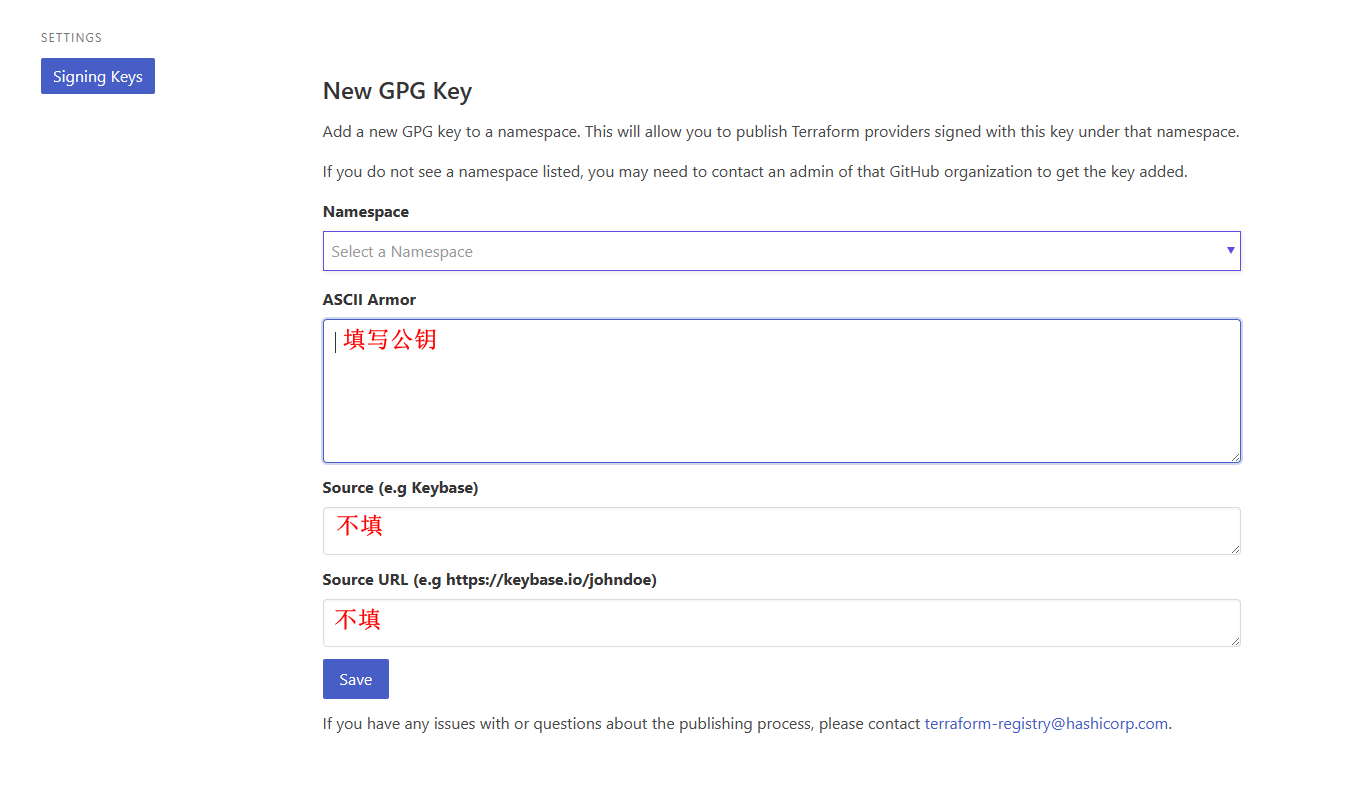
进入Terraform官方公钥管理 (opens new window)中,配置刚才生成的公钥
点击Publish -> Provider,会自动探测仓库中的terraform工程
# 参考文档
- terraform中文文档推荐:https://lonegunmanb.github.io/introduction-terraform/
- terraform开发官方样例:https://developer.hashicorp.com/terraform/tutorials/providers-plugin-framework/providers-plugin-framework-provider
- docker:https://github.com/kreuzwerker/terraform-provider-docker
- 阿里云:https://github.com/aliyun/terraform-provider-alicloud
- 腾讯云:https://github.com/tencentyun/terraform-provider-tencentcloud